Color Combinations in the Garden

Combining floral and foliage colors can be an enjoyable and challenging aspect of garden design. The plant kingdom offers a vast range of possible color combinations, including mixes of the various shades of green.

When planning floral color combinations in the garden, a basic consideration is to select plants that will display their colors at the same time. This issue alone can require compiling notes regarding the bloom periods of plants under consideration, drawing on reference materials such as Sunset’s Western Garden Book.

In addition, the selected plants should have similar requirements for exposure, irrigation, and drainage.

Then, it will usually be desirable to select plants of similar size, so that the blossoms will be in fairly close proximity for optimal effect.

Once the gardener has satisfied these placement and cultivation considerations and has identified a good number of candidate plants, the focus can be on deciding the actual color combinations.

Unless the gardener has a natural gift for visualizing and evaluating color combinations, a color wheel is a useful tool for combining colors in a systematic manner, presenting the spectrum of colors in the familiar sequence of red, orange, yellow, green, blue, indigo and violet (ROYGBIV). They vary primarily in the range of hues presented. A very basic wheel will show just the three primary colors: red, yellow, blue. A more advanced wheel will include the secondary colors: green, orange, purple. An even more detailed wheel will include the six tertiary colors, which are created by mixing primary and secondary colors.

A search of the Internet will produce numerous examples of color wheels for convenient reference in planning color combinations in the garden.

Color theory can be a lengthy study for visual artists and others seeking to appreciate the subtle relationships among colors.  Most gardeners will need only familiarity with the basic color relationships on the color wheel: complementary (opposite colors), analogous (adjacent colors), triadic (three colors evenly spaced), etc. For illustrations of these and other relationships, search the Internet for “color harmonies.”

Real-world combinations might be reflect one of the formal color harmonies, but are as likely to be only a rough approximation. For example, this photo shows a chance mix of a blue-purple salvia blossom and a pink/white geranium blossom. This is a roughly analogous combination, but because the color green adds to the display, it qualifies as a roughly triadic harmony. In any event, if it pleases the gardener, it’s a success!

Salvia and Geranium combine pleasing colors

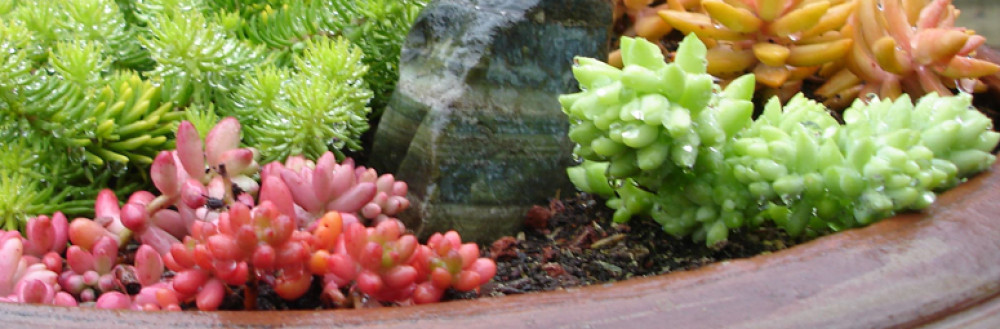
Another example of a chance mix shows succulent foliage in various shades of green. This too is a roughly analogous combination based on a small sample of the many greens that appear in many gardens.

Succulents provide several green hues

Here is a brief reality check on color combinations in the garden.

  • Creating classic color harmonies requires lots of study to select plants with similar cultivation needs, compatible sizes, and the “correct” floral or foliar colors.
  • Many plants will present pleasing combinations of colors virtually by chance. While beauty is in the eye of the etcetera, it’s difficult to imagine mismatched colors in nature.
  • Garden magazines often include breathless excitement over apparently random color combinations, and describe them with verbiage about their inspired creativity,

If you discover two or more plants that would provide a good mix of colors in your eyes, move them together or keep them together, and enjoy the effect. Garden design by the book can be time-consuming and frustrating, while botanical serendipity can be a delight.

Enjoy your garden!

Strategic Use of Specimen Plants

Recently, we focused on three basic priorities for landscaping: develop a short list of plants, install significant numbers of each kind of plant, and select some unfamiliar plants that will fit into your plan.

A complementary strategy emphasizes the strategic use of specimen plants, which are “unusual or impressive plants grown as a focus of interest in a garden.” A specimen can thought of as an example of a category, but

A plant could function as a specimen plant if it is sufficiently large, especially showy, striking in form, or quite unusual. Note that a plant doesn’t qualify as a specimen plant simply by being an isolated instance of some plant. In other words, a garden of single examples of various plants does not work as a landscape of specimen plants. 

Conversely, a plant that works as a specimen because it is large, showy, striking or unusual probably would not work as a component of a mass planting. Instead, a specimen plant complements a mass planting.

Many plants could qualify as a specimen plant. Garden designers often will choose a tree of appropriate size as a specimen plant. Japanese maples, for example, are popular selections for this purpose.

The placement of a specimen plant contributes significantly to its effectiveness. In many cases, the specimen will succeed best as a contrast to a fairly large grouping of plants, especially foliage plants, e.g., hedges.

A “large, showy, striking or unusual” plant that is apart from other plants also could function as a specimen plant.

As an example from my garden, we have a Kennedia beckxiana ‘Flamboyant’, which is an evergreen climber in the Pea Family (Fabaceae), and one of the UCSC Arboretum’s Koala Blooms Australian Plant Introductions. The plant’s common name, Cape Arid Climber, refers to a region in western Australian.

Kennedia becksiana ‘Flamboyant’ climbing on a stairway

The plant’s generic name honors a British nurseryman, John Kennedy, and its specific name honors Gustav Beckx, a 19th century Belgian consulate General in Australia.

It earns the variety name ‘Flamboyant’ with its 2-inch long orange-red flowers with a showy large lime-green central spot at the base of the reflexed keel petal.

Kennedia beckxiana blossom (Wikimedia photo by Christer Johannson via Creative Commons)

I acquired a five-gallon plant about a year ago from the Arboretum, and installed it to climb on a stairway. It has grown vigorously there, and will soon reach its mature height of ten feet.

My online research into the cultivation of this robust plant suggests that it should be cut back heavily after flowering to prevent invasive growth.

Given its prominent location and showing blossoms, my Cape Arid Climber will hold its own as a botanical focal point.

Look for a spot in your garden where a specimen plant could attract the eye and add interest to your landscape. You might have a fine selection already in place, or one that could be moved to such a special location. If you have “spotted the spot” but don’t have a specimen plant in hand, you can anticipate the pleasure of choosing one for your garden.

Mark Your Calendar

The Monterey Bay Area Cactus & Succulent Society will hold its Fall Show & Sale on September 29th and 30th, in nearby San Juan Bautista, where there is enough space for Society members to fill some eighty tables with fascinating plants for sale or display. We’ll have full details about this event in next week’s Home & Garden section, so be sure to schedule the date for this opportunity to acquire succulent plants for your landscape.

Landscaping Priorities

This year’s Fall Equinox lands on September 22, marking the unofficial start of the planting season.

Installing new plants in your garden during the fall provides them time to establish roots and prepare for leafing out and blooming in the spring. Ideally, we would have our historic pattern of winter rains during this time, so that the plants will have ample moisture to work with.

An additional benefit of this planting schedule might include end-of-season plant clearance sales at your favored garden center or nursery. You can feel like a savvy garden shopper when you acquire plants at good prices in the fall, and resist the temptation to stock up in the spring, when small plants have been forced into seductive blooms with nitrogen fertilizers.

The planting season is still a couple weeks away, so right now is a good time for planning to select and install plants in your garden. Having a plan when you open a mail order catalog or walk into a garden center will prepare you to focus your targets and avoid becoming overwhelmed by the array of possibilities.

Strategies for garden planning in the Monterey Bay area include emphasizing drought-tolerant plants, or California native plants, or a particular theme of your own choosing. Earlier versions of this column have addressed such strategies.

Today’s column describes additional strategies suggested by Rochelle Greayer, author of Cultivating Garden Style (Timber Press, 2014). In her online newsletter, Pith + Vigor, Greayer recently identified three mistakes that gardeners make when designing with plants:

  • Too many different plants
  • Not enough plants
  • Planting just the plans you know.

Let’s consider positive strategies in these three areas.

First, develop your landscape around a just nine to twelve different plants. Selecting plants in this short list for specific roles will bring order and cohesion to the landscape, and avoid the chaos that too often results from impulsive additions of individual plants.

Second, once you have selected your short list of plants, install lots of them. This strategy is related to adding plants in clusters of three, five, or any other odd-numbered quantity, to present them in a natural and pleasing manner. As you reach larger numbers, install the plants in swathes or bands to provide a landscaping effect. Greayer says, “Repetition gives a scheme flow and rhythm. Repetition is a savvy designer’s best trick.” For example, I recently planted two parallel arcs of blue and yellow irises as a color statement for next spring. Over the next few seasons, these plants will increase to provide increasingly dramatic displays.

A swath of Dalmation Iris (Iris pallida ‘Variegata’) backed up with Lavender plants
A bed of hardy geraniums (Geranium × cantabrigiense ‘Biokovo’ ) with a garden art pheasant

Related to the idea of repetition planting is the installation of plants with close spacing. While you might be tempted to spread plants out to cover space in the garden, having open areas between plants reduces their visual impact and invites the growth of weeds. Close spacing reflects the natural tendency of plants to propagate and develop into colonies. It also functions as “green mulch,” denying weeds the sunlight they need to develop.

Third, explore the wonderful world of plants to find good choices for your short list of selections for the landscape. It’s always important to select plants that are suitable for the climate, soil and exposure of the locations for which you are planning, but there are always many interesting selections that are both suitable for your garden and new to your experience. Relying on common and familiar plants will doom your landscape to being (gasp!) ordinary. Discover interesting plants that will bring excitement to your garden, and invest time in learning how to cultivate them successfully.

In review, there are three strategies for planning the development of your garden during this planting season: develop a short list of plants, install significant numbers of each kind of plant, and select some unfamiliar plants that will fit into your plan and provide a fresh new look to your landscape.

Enjoy this fall’s planting season, and your garden’s coming spring!

Dividing Perennial Plants

As the blooms fade on your perennial plants, the opportunity arrives to propagate your favored specimens by through root division.

The best candidates for this process will have been growing for at least two years, and preferably a bit longer. The ideal time for propagation by root division is after a healthy plant has had time to develop a substantial root system, and before it has become crowded and less productive of blossoms. When divisions are planted, they should be watered lightly and shaded temporarily to limit loss of moisture.

The preferred time of the year to divide perennials is early spring or early fall, rather than the mid-spring to late summer period, when perennial plants are growing and producing blossoms. With this schedule in mind, right now is a good time to consider which plants to divide. This timing gives the divided plants the fall and winter months to develop roots and prepare to burst into bloom next spring.

The general guidelines mentioned above apply to all kinds of perennial plants, but the process differs somewhat with broad categories of these plants.

Rhizomatous and Tuberous Plants

Plants that grow from rhizomes or tubers can be dug up carefully with a garden fork, separating the rhizomes or tubers by hand or knife, and replanted at the same depth as the original plant. Tuberous plants include Arum, Calla (Zantedeschia), Canna, Dahlia, Spurge, and others.

Examples of rhizomatous plants are Iris, Canna and Bergenia. Other in this category: ginger (Zingiber officinale), the related White Ginger Lily (Hedychium coronarium), and the bamboos, which are members of the grass family (Poaceae) and manage propagation quite well on their own.

Blossom of White Ginger Lily
Rhizome of White Ginger Lily

Once dug and divided, these plants could be replanted immediately, or should be kept in a cool and dark place until a convenient time for replanting in the fall.

Clumpers

Another category of perennial plants is the “clumpers,” which have fibrous root systems and clumping growth habits. These plants’ root balls can be dug up with a garden fork or spade, and then either pried apart by hand or split with the spade. The gardener might need to use two garden forks to divide really large root balls.

The number of divisions to be made from a given plant will depend upon the size of the root ball. Often, dividing the root ball into four quarters will be appropriate. While a larger number of smaller divisions might be desirable, they could require more time to become ready to bloom.

The roots of divided plants in this category should not be allowed to dry out. Ideally, they should be dug during an overcast day, replanted promptly, and watered in. Trimming the foliage to reduce transpiration also will help the plant to bounce back from the process.

The clumpers comprise a large group of perennial plants. Examples: coral bells (Heuchera), cranesbills (Geranmium), columbines (Aquilegia), daylilies (Hemerocallis), plantain lily (Hosta), primroses (Primulus), lamb’s ears (Stachys), bugleweeds (Ajuga), Japanese anemone (Anemone hupehensis, which propagates readily on its own), stonecrop (Sedum), yarrow (Achillea), and several larger grasses.

Runners

These plants have shallow stolons or thin rhizomes, and spread across the ground. They can be divided in the same as way as clumpers. Examples include bee balm (Monarda), goldenrod (Solidgo), and aster (Symphyotrichum).

Plants with Woody Crowns

Plants that have woody crowns can be divided with somewhat more effort than other categories. The basic process is the same as for fibrous-rooted clumpers but typically require cutting the root structure apart with garden shears or saw, e.g., a pruning saw.

Examples of these plants include Astilbes, bear’s breeches (Acanthus), foxtail lilies (Eremurus), goatsbeard (Aruncus), lilyturf (Liriope), peonies (Paeonia), and wild indogo (Baptisia).

Plants Best Not Divided

Some plants have root structures that do not divide well: they might have single taproots or single woody roots, and are best propagated by seed. These plants can be recognized easily when they have been dug up. Examples include lavender (Lavendula), Russian sage (Perovskia), Allysum, carnations (Dianthus), Euphorbias, foxgloves (Digitalis), butterfly weed (Asclepias), and others.

Dividing perennials can be a satisfying project for avid gardeners, and the most inexpensive way to multiply favored plants to the landscape. Tour your garden in a search for division candidates. 

Gardening in Containers

Planting in containers can be a complement to planting in the ground, and it has multiple appeals:

  • alternative to garden space that’s limited (or lacking entirely);
  • opportunity for creative combinations of pots and plants;
  • supports either long-term or seasonal displays;
  • freedom to hide pots with plants after blooming;
  • design strategies for paved areas, like decks and patios;
  • ideal use of wide stairways; and
  • invites large and dramatic arrangements;

Container gardeners soon develop their personal likes and dislikes, but if this approach is new to you, here are ideas to consider.

Plan plants and pots as complements: One method is to choose a container that you like, and then find a plant that would work well with it. The reverse strategy can work too, but there are more plants than pots, so it’s easiest to find the right plant for a given pot. Find complementary colors, textures, and sizes. (One rule of thumb: the plant ‘s mature height should be about twice the height of the container.)

Think big pots: For a striking presentation, select large pots. A collection of one-gallon plastic nursery pots will minimize cost, but will also minimize impact. Smallish decorative containers, even when individually attractive, still under-sell the horticulture. Big pots produce big results, and provide more root room and hold more moisture between watering sessions.

Think multiple pots: Just like planting in the ground, mass effects can be pleasing to the eye and satisfying to the soul. A substantial array of containers can present an eye-catching display. Three is better than two, and, given lots of available space, fifteen is better than twelve. Multiple-pot displays could emphasize annuals or perennials, and can be particularly effective with bulbs.

Plan the overall look:  It’s too easy to accumulate both plants and pots one at a time, which leads to a confusing conglomeration. Such groupings reflect piecemeal landscaping, which is all too popular and ultimately minimizes bang for the buck. The first step in planning for multiple pots emphasizes the overall effect, even when limited time and resources requires building the display over weeks or even months. The plan should encompass the style of the containers. They need not all be the same, but they should work together. A Talavera planter probably will look out of place among several terra cotta pots. The plan also should also consider blossom color combinations, e.g., complementary, analogous, triadic, etc. Search the Internet for “color harmonies.”

Plan individual containers: An important difference exists between a floral arrangement, and a container that plays a role in a larger display. When planning a standalone display, the “thriller, filler, spiller” design works fine. When planning for a big, dramatic effect, however, plant each container with one type of plant in one color. And fill the containers: for example, a 12-inch wide pot can accommodate up to 30 bulbs. A more timid installation will look, well, timid.

Consider the passage of time: When building a display of seasonal plants, keep their bloom period in mind. When blooms have faded, move the containers out of sight and bring in different, ready to bloom containers. An intermediate approach involves installing layers of bulbs with successive bloom periods. This requires some planning, but the extended display can be gratifying.

Large-scale container planting takes some research. If you are considering a display of bulbs, right now is the time to order bulbs to be planted in the fall, for spring blooms. One good online resource is Brent & Becky’s Bulbs. I’ve had the pleasure of having dinner with Brent and Becky Heath, so I’m partial, but there are other very good online bulb nurseries, some of which offer wholesale prices for container gardening on a larger scale.

For design inspiration, search the Internet for “bulbs in containers,” and select “images.”

Do you have a suitable space for container gardening?

Hybridizing Aloes

Hybridizing plants is an easy process: bees do it! They’re usually pollinating plants of the same species, but occasionally, they move a plant’s pollen to a different, compatible species and, without intention, begin the process of natural hybridization.

Human hybridizers, by contrast, have a plan: to improve specific plants. Pursuing this goal requires more than accident. Legendary hybridizer and sometime romantic botanist Luther Burbank said, “The secret of improved plant breeding, apart from scientific knowledge, is love.”

Another important secret, according to contemporary hybridizer, Karen Zimmerman, is fun! She strongly recommends and enjoys hybridizing aloes and growing plants from seed.

Zimmerman is the Succulent Propagator for the Huntington Library, Art Galleries andBotanical Gardens, in San Marino, California. The Huntington’s Desert Garden is one of the largest and oldest assemblages of cacti and other succulents in the world, so her work includes a generous measure of fun.

Speaking to the Monterey Bay Area Cactus & Succulent Society, Zimmerman focused on hybridizing aloes, a genus of succulent plants that includes some 450 species.These include the common Aloe vera, which has a variety of medicinal uses, including soothing sunburns, but a wide range of other forms exist within the genus.

As a hybridizer, Zimmerman studies the several kinds of aloes and explores the potentials of combining features of different kinds to produce hybrids with desirable characteristics. She described several categories of aloes:

  • Size & Form: miniatures, shrubs, trees, and creepers
  • Unusual Leaf Arrangements: fan, spiral rosette
  • Teeth, Prickles, “Warts” or Bumps
  • Colors: white, green, red, black, various patterns

She recognized several prominent hybridizers of aloes, including Kelly Griffin ofAltman Plants, and Brian Kemble of The Ruth Bancroft Garden & Nursery. Hybridizing can build upon the products of other hybridizers, or work primarily with natural species. Hybridizers typically welcome efforts to add to their successes by crossing their hybrids with other plants. This approach is not so much plagiarism as respect. 

Generally, hybridizing can seek improvements in plants for landscape appeal, flowering, vigor, pest or disease resistance, or other characteristics. Zimmerman emphasizes what she terms “fantasy aloes,” which have unusual colors, patterns, or spinose teeth on the leaf margins. She has introduced several hybrid aloes with names that suggest fantasies, e.g.,  ‘Dragon’,‘Gargoyle’, ‘Wily Coyote’, and ‘Chameleon’.

Aloe ‘DZ’ a hybrid by Karen Zimmerman

The process begins with transferring pollen from one plant to another. Zimmerman uses various tools for this task, and currently favors her fingers, tweezers, and dentistry tools.

The nextstep is to collect the resultant seeds, which are small and easily lost.Zimmerman recommends mesh drawstring gift bags, which are inexpensive and effective in catching seeds.

She plants the seeds with labels indicating the “pollen parent” and “seed parent,” plus date and other information of interest. Her planting mix is 80% pumice and 20%forest humus, with the seeds covered with grit. The seeds need to be kept in warm, moist conditions, which can be provided with a closed plastic bag in indirect light.

Aloes, which are monocots, germinate and produce one leaf from the seed in about two weeks. As the plants develop, the hybridizing process consists of editing: the cross between two plants produces numerous seedlings, some of which hopefully will exhibit the desirable traits the hybridizer intended, and others (perhaps all!)will be—as Zimmerman describes them— less interesting, boring, or even ugly.

The seedlings will take various amounts of time to show their mature form. Zimmerman compares them to human teenagers, who reveal their “true selves” at various ages. Some very young seedlings will be unique in interesting ways, while others might be late bloomers.

Editing the seedlings can be the hybridizer’s most important function. It involves choosing those that are worthy of continued development and those that are discarded to make room on the nursery bench.

The hybridizer thinks of appropriate names for the successes and eventually introduces them to commercial distribution. That process uses tissue culture(cloning) to propagate enough cultivars to meet market demand. Seed propagation doesn’t work because growing hybrids from seed yields unpredictable results.

Throughout her talk, “Aloes on My Mind,” Zimmerman demonstrated her continuing enthusiasm for hybridizing aloes, and revealed that, “The real fun is imaging what’s next!”

The succulent gardeners in her audience recognized that hybridizing plants is easy and an enjoyable aspect of gardening that they might just try themselves. One of them could produce next season’s most exciting hybrid aloe.

Planning a Cutting Garden

An ornamental garden, as contrasted with an edible garden, often will yield a number of blossoms suitable for occasional floral arrangements. To produce blossoms specifically for indoor display, however, the gardener needs to develop and maintain a cutting garden.

A cutting garden can be as small or as large as the gardener chooses. Because it serves as a “blossom factory,” it need not be a landscaping feature. It could be a rectangular space with plants in orderly and efficient rows. The bed could be as short or long as desired, but should be no more than about four feet wide, with access on both sides for cultivation, maintenance and harvesting.

The bed should follow the familiar basic standards: fertile soil with good drainage, six-to-eight hours of sunlight, and convenient access to irrigation.

A grouping of Dahlia ‘Jomanda’. Image courtesy of the Monterey Bay Dahlia Society

Plant selection should reflect the gardener’s preferences, which might be based on personal favorites, intended combinations of blossom colors, or other criteria. Unless the gardener has particular plants in mind, the initial plant selection might be based on expert recommendations.

The best source I know for such recommendations is Debra Prinzing, advocate for American-grown flowers, author of The 50 Mile Bouquet and Four Seasons of Locally Grown Bouquets from the Garden, Meadow and Farm. Here are her current top ten picks for summer bouquets:

  • Dahlia — medium-sized forms
  • Zinnia — Queen series for soft colors; Persian Carpet varieties for textural accents
  • Sunflower—‘Plum’, ‘White Night’, ‘Moulin Rouge’, ‘Strawberry Blonde’, ‘Chocolate’
  • Cosmos—Double Click and Cupcake series
  • Ammi—(called false Queen Anne’s Lace) ‘Dara’, ‘White Dill’, and ‘Green Mist’
  • Yarrow—both pure colors and muted/pastel varieties
  • Shasta Daisy—especially double forms like ‘Crazy Daisy’ and ‘Sante’
  • Roses —try some in the caramel and terra cotta range: ‘Hot Cocoa’, ‘Cinco de Mayo’, ‘Pumpkin Patch
  • Herbs— purple basil and ‘Berggarten’ sage for foliage and fragrance
  • Nigella—blue blooms, unusual seedpods, and lacy greenery are eye-catching

After the gardener has selected plants for the cutting garden, the options are to buy and install small plants at a garden center, or plant seeds. Buying small plants involves paying someone for starting the plants from seed, so it’s faster and more expensive than growing your own. But choices could be limited Planting seeds requires less expense, and also provides access to a wide range of options.

Seeds should be planted at the right time of the season. Some seeds should be started indoors in early spring; others are best planted in the ground in early spring, early summer, or mid-summer/early fall. This month is still a good time to start certain seeds for a cutting garden.

An excellent source of recommendations for seasonal planting of seeds for flowering plants is local expert Renee Shepherd. For a timely list of flowers to plant now, browse to her website, click on “Gardening Resources” and search “Time to plant Renee’s Garden Seeds.” Her seeds are among those on display in garden centers.

Seed packets typically have brief instructions for successful planting of seeds.

Flowering plants that have multiple, branching stems will produce maximum yield of good quality flowers with long stems when their primary stems are cut back (“pinched”) at an early stage of growth. Examples include carnation, cosmos, dahlia, and snapdragon.

Pinching is not appropriate for plants that produce just one flower per plant. Examples of such plants include flax, stock, and single-stemmed sunflowers.

Growing your own flowers for bouquets and floral arrangements is one of the most satisfying garden activities. A good time to start your own unique cutting garden, and beginning to gain experience and enjoy the process,  is mid summer/early fall. That’s right now!

Landscaping for Historical Homes

The MontereyBay area was settled in the 1800s; incorporation of Santa Cruz was in 1866, andMonterey in 1889. The area has a good number of older houses, and some current owners of those earlier residences might wish to create a garden that reflects their home’s historical landscape.

A landscaping friend recently began work with a client who lives in a residence built in 1895, and wants to create a garden typical of that era. My friend would like to identify plants that were in home gardens at that time.

A gardening nerd could not ignore such a challenge!

I search the Internet for lists of plants that were in residential gardens of the Monterey Bay area in 1895 (or around that time), and discovered that homeowners did not share lists of plants in their gardens.

There were several missions in central California that typically had gardens of edible and ornamental plants, and missions often recorded their activities. They seemed a promising source of information, but my searches yielded no fruit.

By chance, I learned that the University of California Botanical Garden at Berkeley was formally established in 1890 “to form a living collection of the native trees, shrubs, and herbaceous plants of the State of California…” and “within two years the collection numbered 600 species.” Given this garden’s impressive online database of plants, compiling a list of native California plants of the era seemed simple.

I found, however, that the earliest entries in the garden’s database begin with acquisitions in 1900, and very few in the early years of the century. Vanessa Handley, Director of Collections and Research told me that the initial acquisition records were not maintained after the garden was moved in 1925-28 from its original central campus location to its current position in Strawberry Canyon, above the main campus.

I visited the website of the California Garden and Landscape History Society, which pointed me to “the most extensive scholarly treatment of California landscape history,” CaliforniaGardens: Creating a New Eden, by David C. Streatfield (Abbeville Press,1994). That book and others that looked helpful were available in used (but good) condition for quite reasonable prices, so I ordered a few additions to my library.

The first book that arrived is Restoring American Gardens: An Encyclopedia of Heirloom Ornamental Plants, 1640–1940, by Denise Wiles Adams (TimberPress, 2004). This book includes an appendix of plant lists extracted from nursery catalogs, focusing on about 100 of the most popular plants, organized by different regions in different eras. These lists represent an extraordinary research project by Ms. Adams.

Her lists for the Mountain and WesternStates include but of course do not target the Monterey Bay area. They would provide fine guidance for planning a historical garden for specific periods: 1870–1899,1900–1924, and 1925–1940.

The plants listed are mostly recognizable; today’s plants certainly existed 150 years ago. The plants we find in local garden centers or mail-order catalogs, however, are often contemporary cultivars that would have developed many years after early gardeners planted their gardens. Projects to create an accurately historical garden should feature species plants, rather than the latest hybrid introductions.

The next challenge would be to find species plants!